Setting up Google Analytics 4 from Scratch
In this article, we will create a Google Analytics 4 account from the beginning. There are two sets of activities we will need to do to start recording analytics data from our website or mobile application.
A. First, we will create a google analytics setup by creating an account, property, and stream. This will provide us with a code for our website or mobile application.
B. Second, we will take the code configured in the google analytics 4 interface and then install it on our website or mobile application.
A. Creating Google Analytic 4 Stream
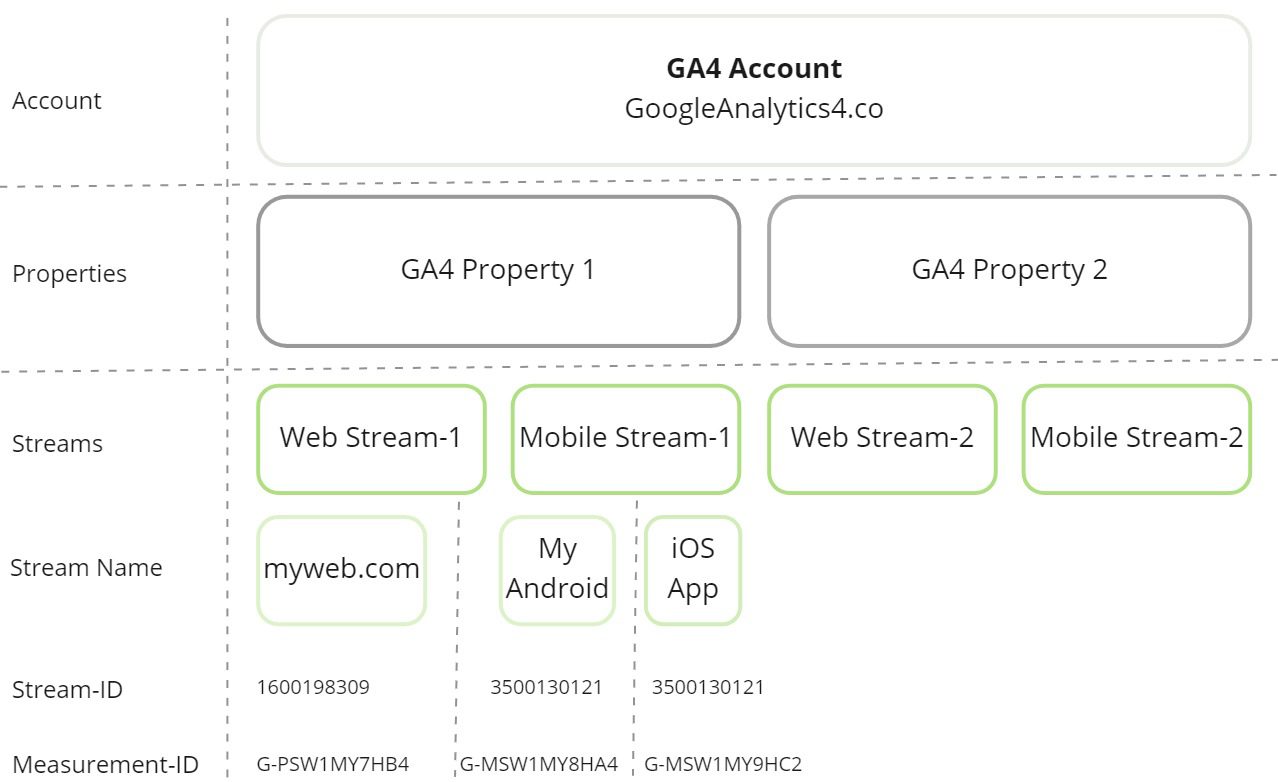
Before creating a stream, it is important that we understand the account structure for Google Analytics 4. It is divided into an Account, properties, and streams. Let us look at them one by one.

1. Create GA4 Account :
An account is a container for your analytics properties, much like, a Gmail account is a container for all your emails. For all practical purposes, you can think of an account as a folder that contains related analytics properties. If you have different brands, you can choose to have 1 account per brand. If you are an educational institute, you can consider creating 1 account for the whole institute or you can consider creating 1 account for every faculty. You can create up to 100 analytics accounts with a single google account.
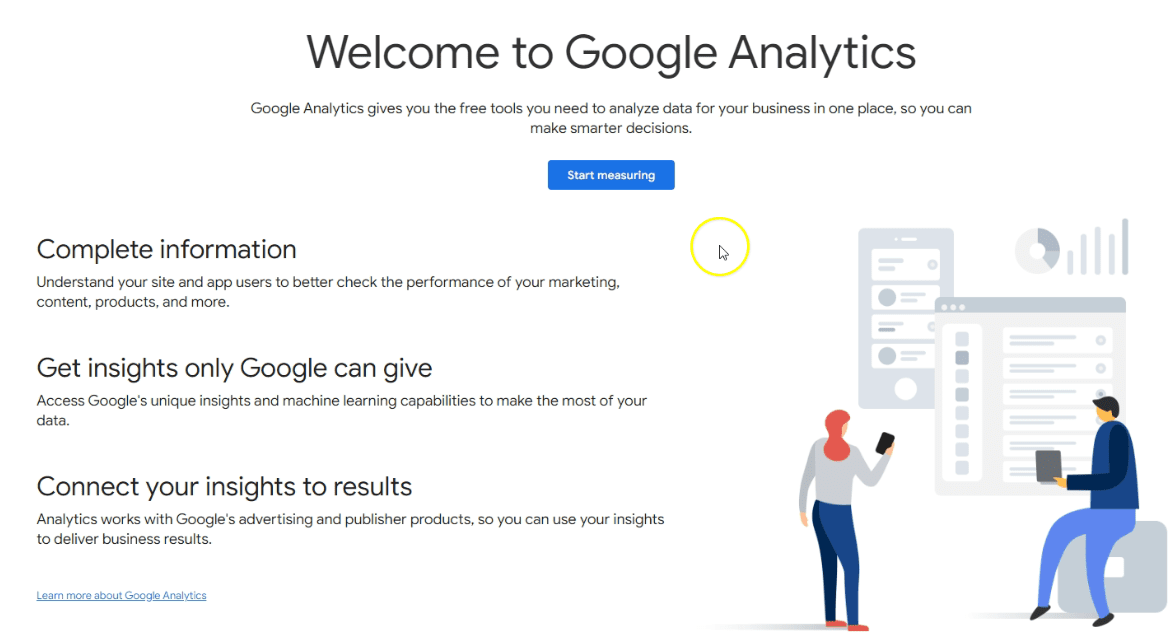
Goto https://analytics.google.com, if you do not have a previous analytics account you will see a screen like this :
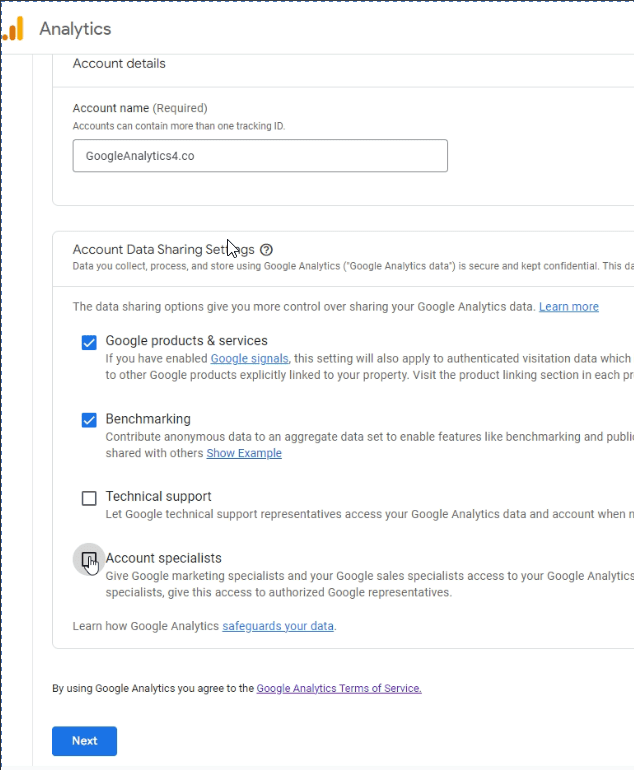
Once you click on start measuring, you will be taken to the next screen in which we can choose a name for the account. In this example, I have chosen my blog name as the account name. Do not worry too much about the account data-sharing settings for now. All of these settings can be changed later from the admin menu.
2. Create GA4 property:
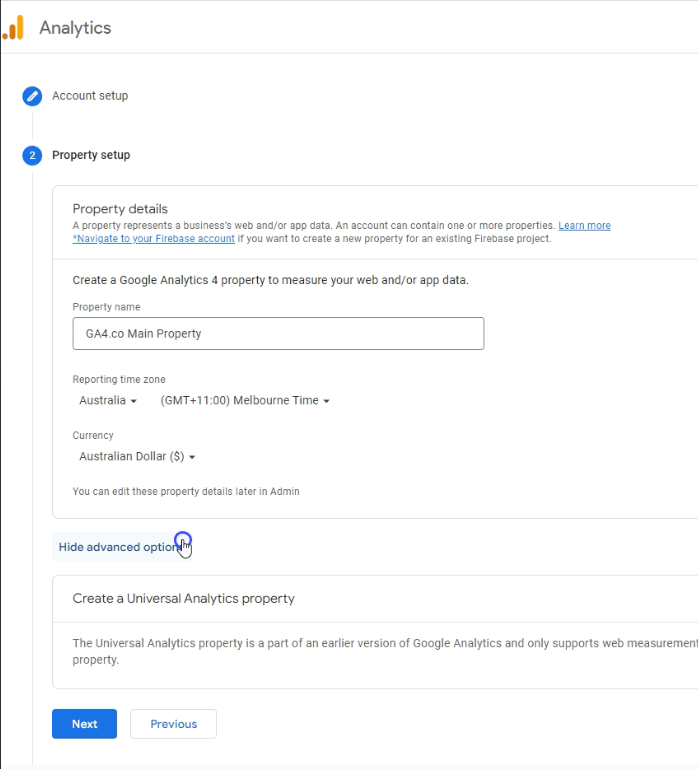
The next step is to create a property. A property is a container for all your analytics reports. A property can collect analytics data for web and mobile applications simultaneously. You can create up to 100 properties in 1 account. Choose any name for the property. Depending on your region, choose your time zone and currency. You can also change these details any time later from the admin section. We will use this property to create streams.
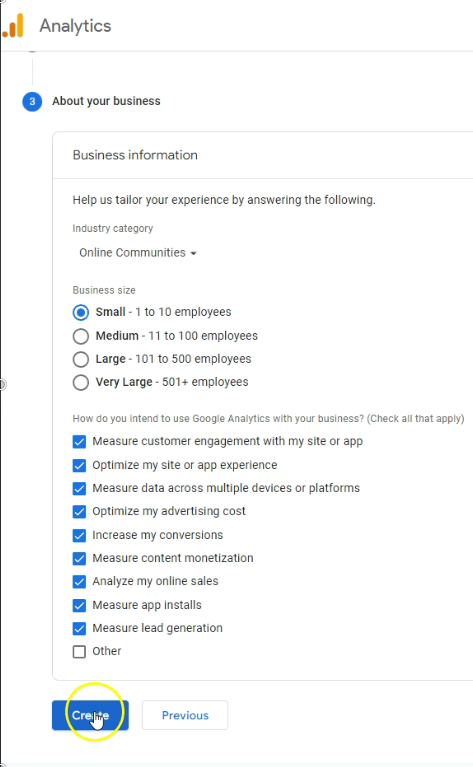
The last step is answering a few survey questions from google. Your choices do not impact your analytics account configuration. Feel free to choose any.
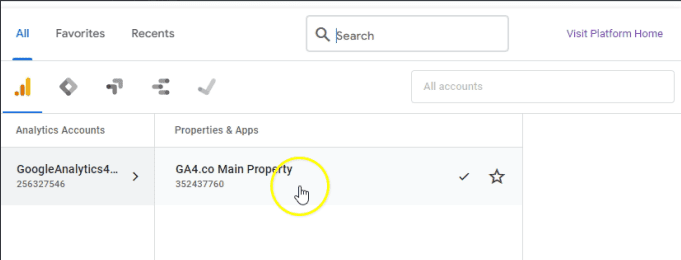
Now, I can see in my account, the property and account are available.
3. Create GA4 Stream:
Stream is the actual source from which data is collected. When creating a stream, we need to give it an arbitrary name. GA4 then provides us with a stream ID and a measurement ID. GA4 supports three types of streams.
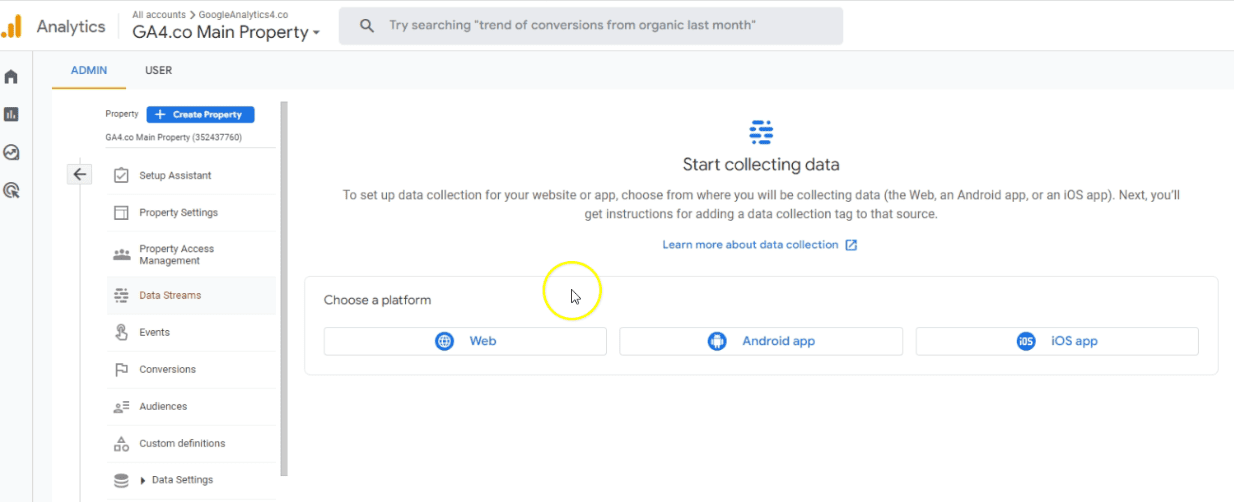
Web Stream :
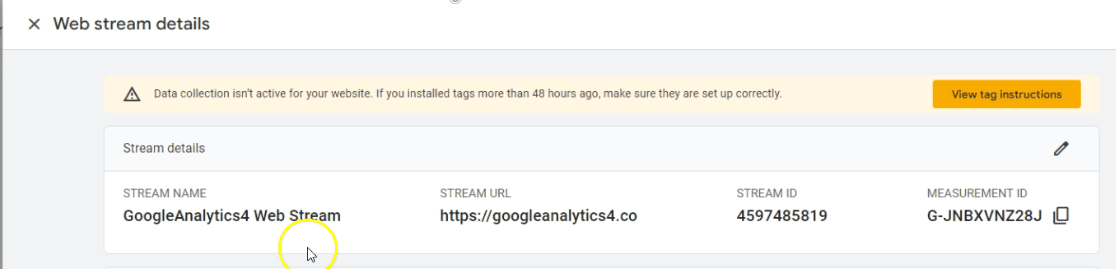
In this example, we want to collect data from our blog , so we will give it the website URL http://googleanalytics4.co. We will also choose a name for stream which can later remind us of the purpose of the stream. I have chosen the name GoogleAnalytics4 Web stream for this example.
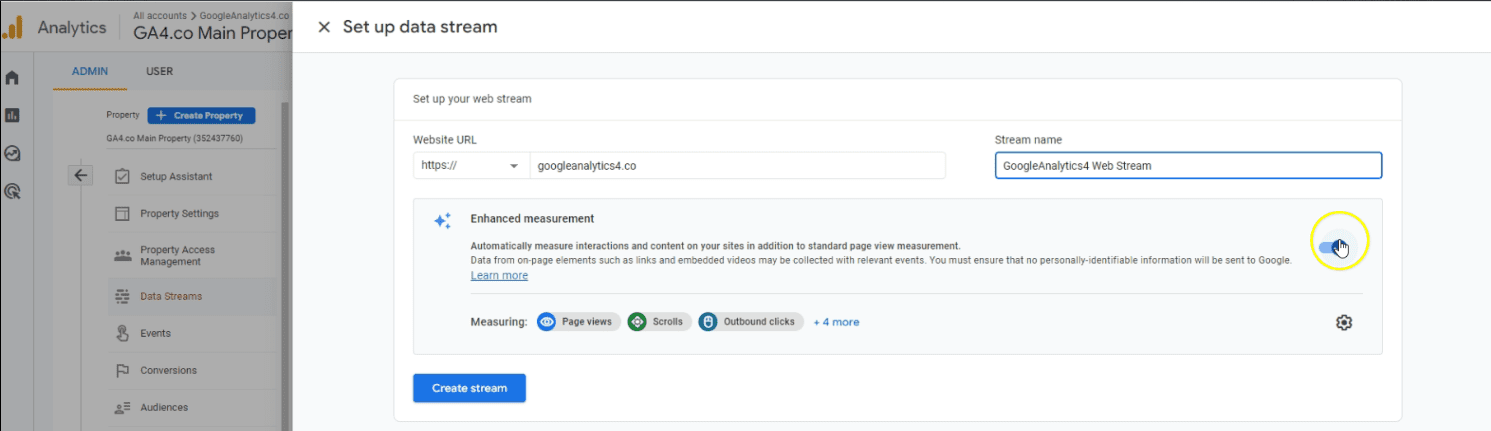
After clicking on the stream button, we will get a Stream ID and a Measurement ID. It will be used then to implement our analytics code on our website.
Android Stream:
If you want to collect and see reports from an Android phone(Samsung, Xiaomi, etc) application, you will create an Android Stream
iOS Stream:
If you want to collect and see reports from an iOS ( iPhone / iPad ) application, you will create an iOS stream.
B. Implementing Google Analytics 4 Stream code
After creating our stream, we can see an option enabled for “Google tag”. Each stream has its own Google tag. We will implement this code on our website to start collecting analytics data. In the screenshot below, you can see the Google tag section at the bottom.
Since we are only setting it up, do not stress about tag settings or connected site tags. We will cover them in a separate article.
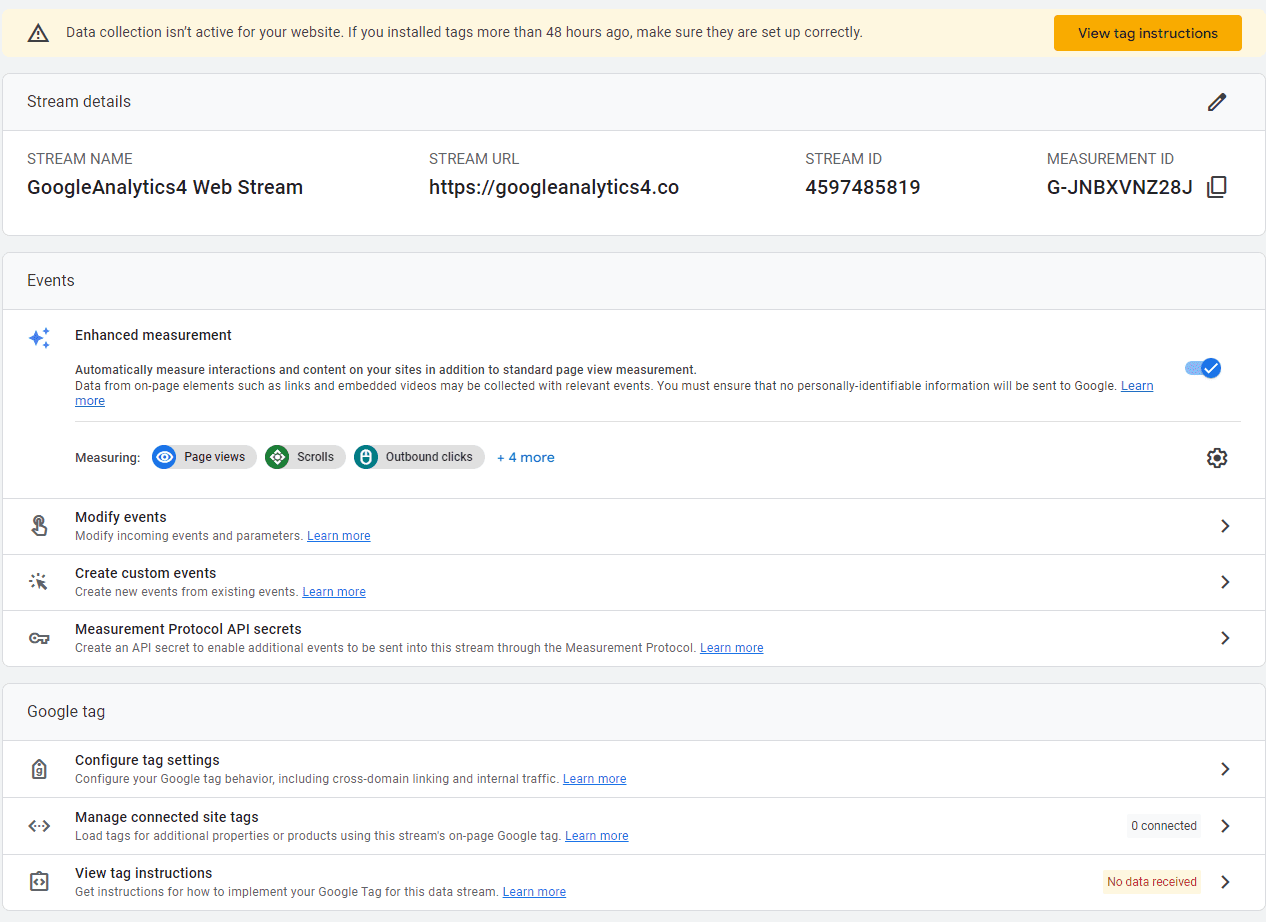
Under Google Tag, click on View tag instructions to get the code required for installation. It gives you two options.
Install with a website builder
The first option of installing with a website builder provides detailed instructions specific to the CMS. At the time of writing in 2023, it supports the Site Kit plugin, MonsterInsights plugin, Wix, Squarespace, Duda, drupal, one.com and typo3. If your website is built on any of these CMS, you will see specific steps on where to go within these CMS. If your website is not built on this, click on second option which is “Install Manually”
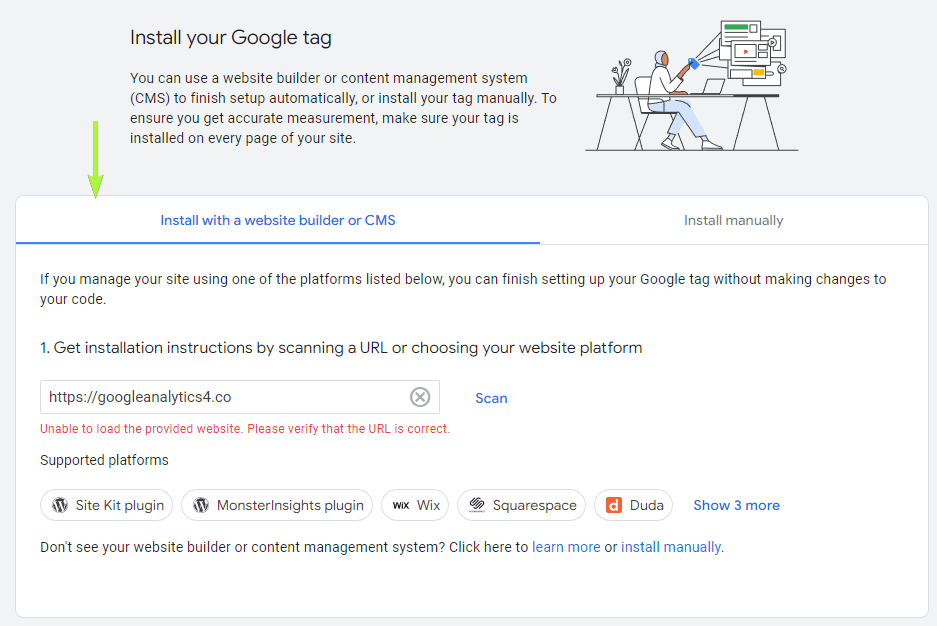
Install manually
Manual install option will give us the implementation code for the Google tag. You can copy the code by selecting all the code or by clicking on the top right icon within the code section.
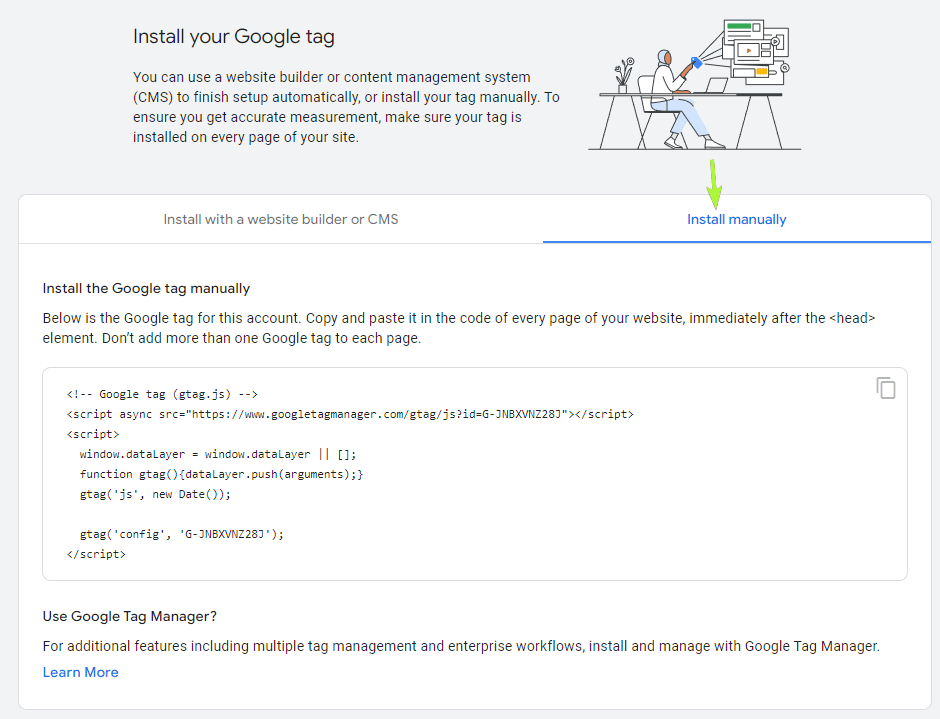 This code should be on all pages of your website immediately after the <head> element.
[…] Get ” Google Tag”. It is the code required for Google Analytics to start collecting data. To obtain the code, you can follow this guide on setting up Google Analytics 4. […]