Implementing User-ID Tracking in GA4
The User-ID feature enables the association of engagement data from various devices and sessions with unique IDs. When you provide GA4 with the User-ID, it links the data to the corresponding user, enabling individual analysis of the long-term user relationship.
In principle, the User-ID is an arbitrary string that you generate for each unique user of your site. The exact method of generating and storing the User-ID can vary depending on your specific needs and the technical environment of your website.
General Implementation Steps
Regardless of the tech stack you have, Google Analytics 4 flow to stitch user-id across different devices usually involves the following.
- Generate a unique user ID corresponding to the user’s existing identity and store it for future identification. E.g.,
- if a user is signing up with email. Create a unique User-ID, link it to the email, and store it in the database.
- if a user is logging in with email. Retrieve the unique User-ID for that email.
- When a user takes an action where her existing identity is invoked, we pass her corresponding User-ID to Google Analytics. E.g.
- When a user signs up, retrieve the User-ID, pass the User-ID to Google Analytics tag.
- When a user logs in, retrieve the User-ID , and pass the User-ID to Google Analytics tag.
There are 3 key privacy considerations you must take into account to comply with Google’s terms and conditions for User-id
- Avoiding the use of impermissible personally identifiable information.
- Providing appropriate notice of your use of identifiers in your website’s Privacy Policy.
- Ensuring that your User-ID must not contain information that a third party could use to determine a user’s identity.
Once you know the general approach, there are several ways to implement this approach depending on the tech stack you have.
Let’s explore three different methods of implementing User-ID tracking in GA4.
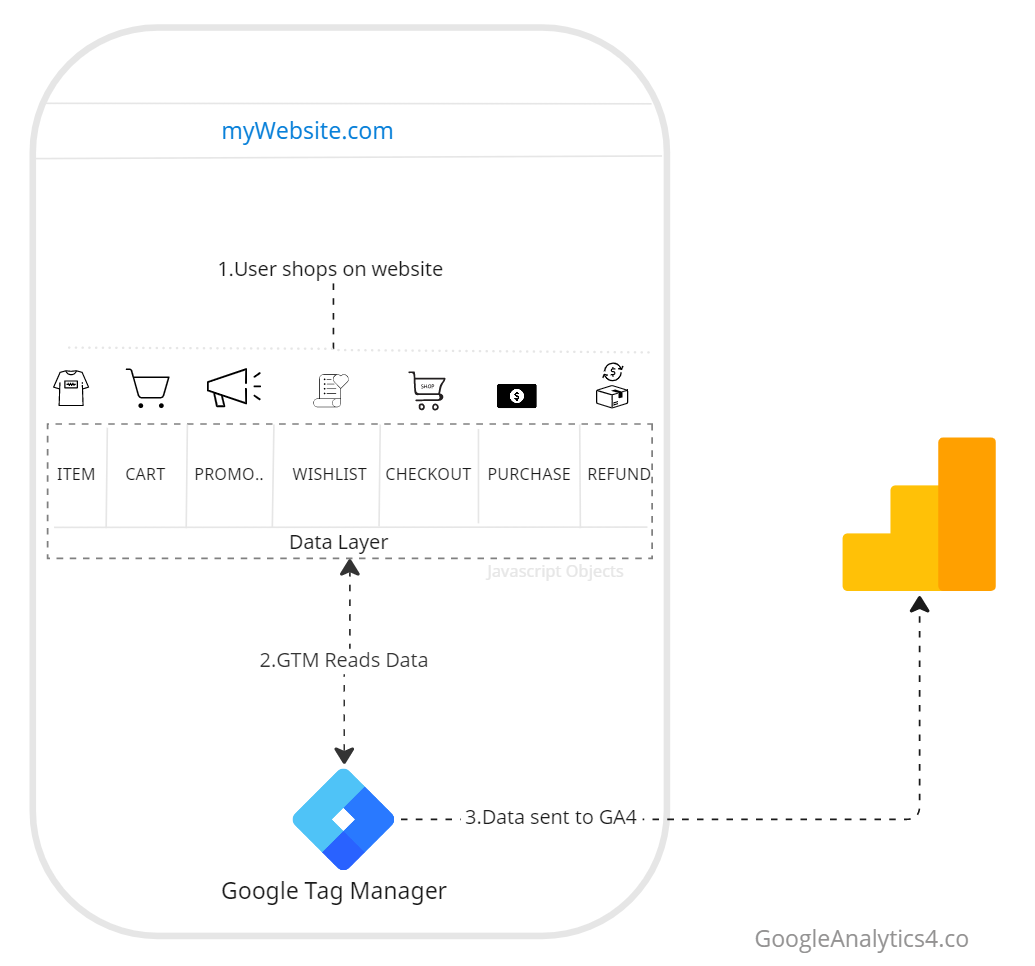
Approach 1: Pushing Data Layer Events
This approach involves pushing a Data Layer event containing the User-ID when a user action occurs (such as registration, login, or form submission). Also, it assumes that you have created a unique User-ID for each user and can retrieve it.
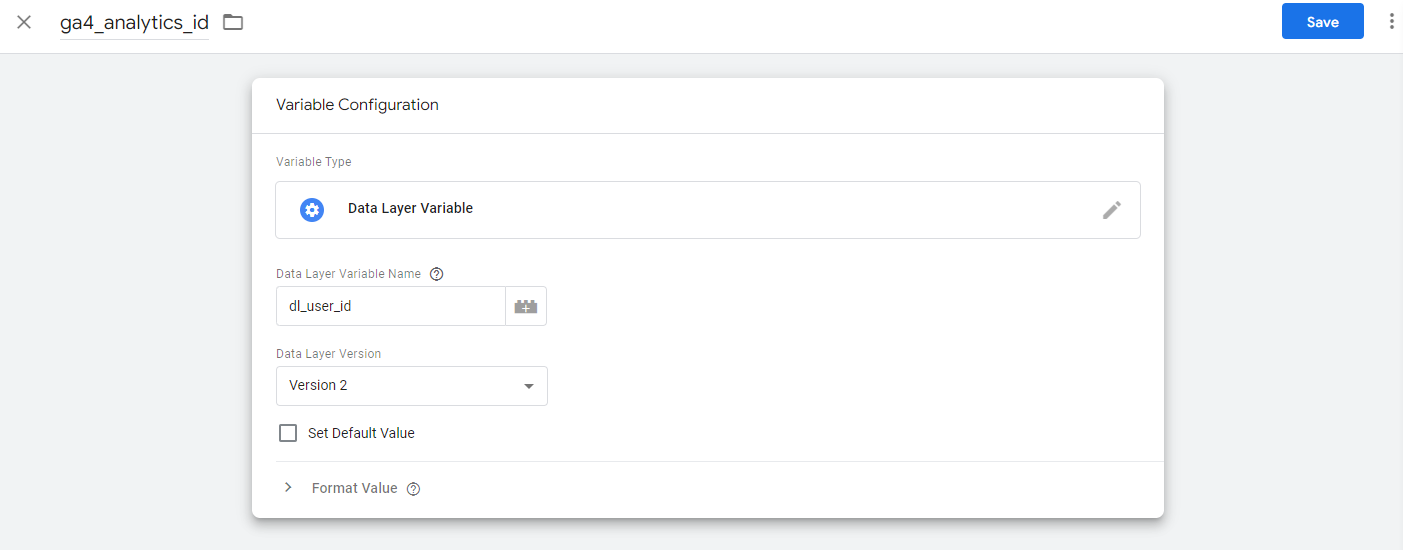
A. Fetch User-ID
- Write a server-side script to fetch the User-ID.
- Use JavaScript to push a Data Layer event containing the User-ID.
dataLayer.push({'dl_user_id': 'ff55jjh234'});
When this code is executed the value of a data layer variable named ‘dl_user_id’ is set to the unique string retrieved from the server. It is important to remember that data layer variable value persists on the page only where the code is executed. It’s not session wide.
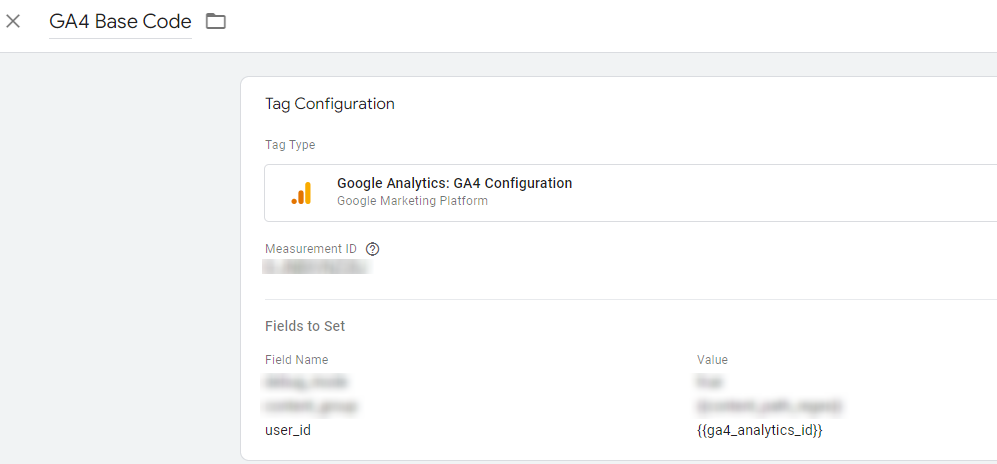
B. Use GTM to push User-ID to GA4 tag.
- In GTM, create a new variable to capture the User-ID from the Data Layer event.
- In your GA4 configuration tag, add a new row in the “Fields to Set” section. Set “Field Name” as “user_id” and the value as the variable you just created.

Remember, when using this approach, the Data Layer event must be pushed before the GA4 event that you want to associate the User-ID with.
Approach 2: Create Cookies from the Web Server
In this approach, the User-ID is stored in a cookie on the user’s browser, which can then be read by GTM.
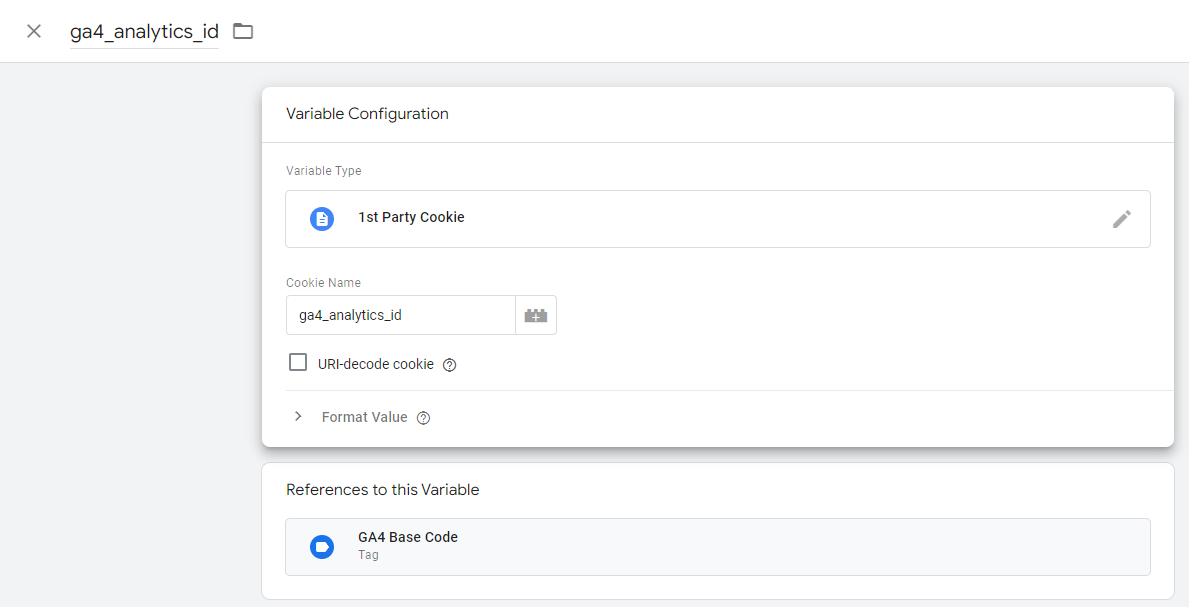
A. Fetch User-ID
Write a server-side script to create a cookie in the browser which stores the User-ID in the cookie.
B. Use GTM to push User-ID to GA4 tag
- In GTM, create a new First-Party Cookie variable to read the User-ID from the cookie.
- As in Approach 1, add a new row in the “Fields to Set” section of your GA4 configuration tag, with “Field Name” as “user_id” and the value as your new cookie variable.
Cookies offer persistence across sessions and are widely supported, making them a reliable way to store User-IDs. However, privacy considerations and browser restrictions on cookies should be taken into account.
Approach 3: Using Local Storage
Similar to the cookie method, this approach uses the Local Storage API in modern browsers to store the User-ID.
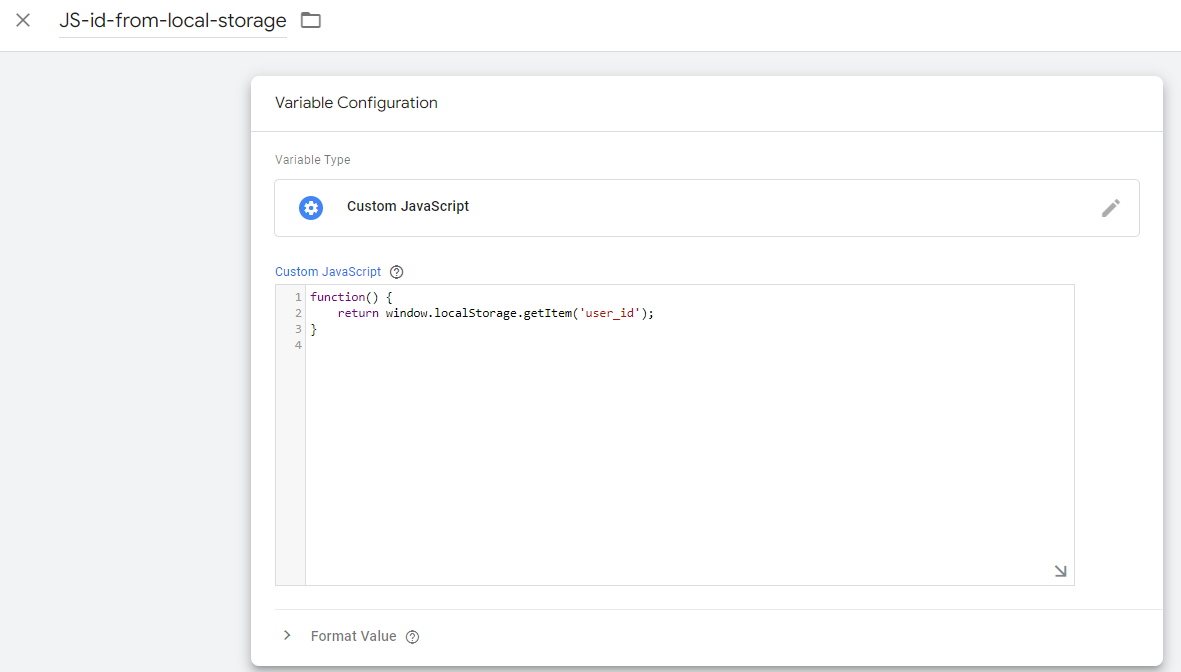
A. Fetch User-ID
Write a server-side script logic to store the User-ID in local storage of the browser.
B. Use GTM to push User-ID to GA4 tag
- In GTM, create a new Javascript variable to read the User-ID from Local Storage.
- As in above approaches, add a new row in the Fields to Set section of your GA4 configuration tag with “Field Name” as “user_id” and the value as your new local storage variable which will be {{JS-id-from-local-storage}}
Local Storage can be a more persistent and reliable alternative to cookies, especially with increasing browser restrictions on cookies. However, Local Storage is not supported in all older browsers.
Wrapping up
GA4’s User-ID tracking presents opportunities for detailed user engagement analysis. The choice between Data Layer events, cookies, or Local Storage depends on your site’s technical environment and needs. However, make sure you comply with privacy regulations when implementing User-ID tracking.
Responses