Adding Google Tag Manager to wordpress without plugin
In this article, we will create Google Tag Manager Account and container. We will then take the container code and install it on a self-hosted WordPress website. You can install Google Tag Manager on WordPress with a plugin or directly. In this article, we will do the direct installation.
Setting up Google Tag Manager(GTM)
With your google account, open https://tagmanager.google.com/. Once the page opens, we can start by creating a GTM account, followed by a GTM container.
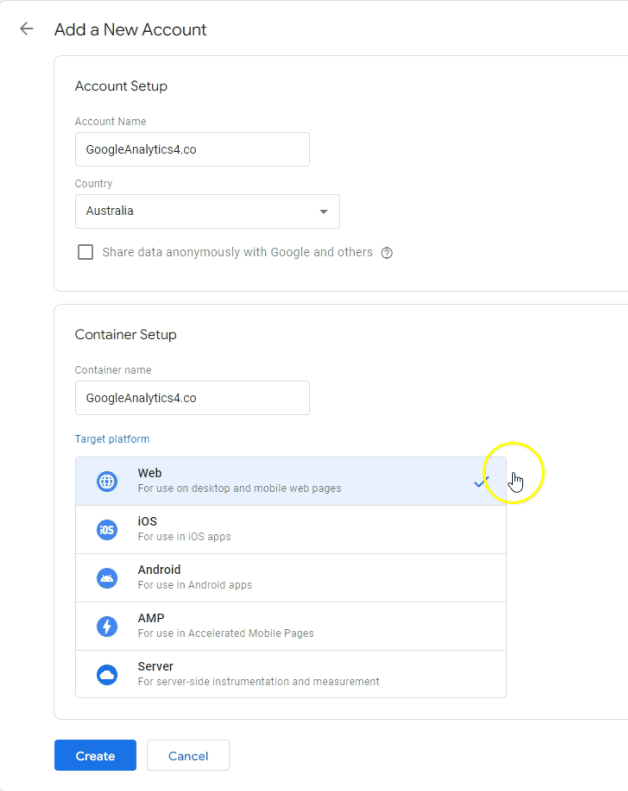
GTM Account :
A GTM account is where we organize and access multiple GTM containers. Once you click on the “Create Account” button, you will see an option to choose an account name and country. You can create up to 400 GTM accounts in a single google account. Pick a name that makes it easier to remember which sites you will be using this account for.
GTM Container:
A GTM container is like a small code repository. It contains code snippets and triggers. In this case, since we are using this container for the web, we will choose “Web” as the target platform.

After you hit create button, it will give the Google Tag Manager container code which we can then install on our WordPress website. If you move away from the screen without copying the code, you can find the GTM code again from Admin -> Install Google Tag Manager
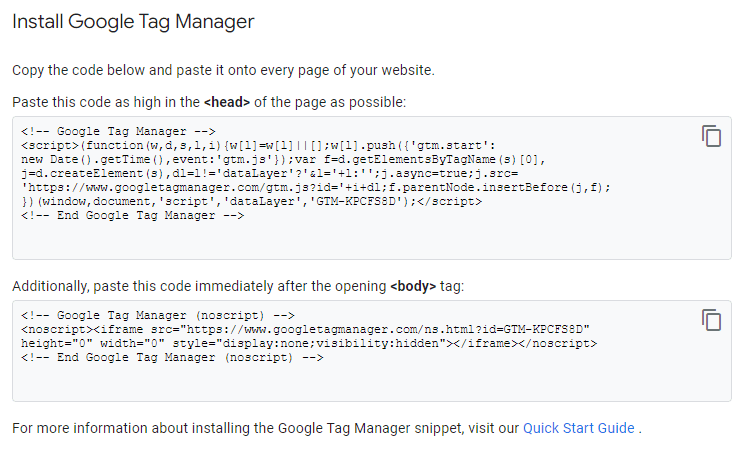
Installing GTM Code
There are two parts to the GTM code. One part goes as high in the <head> of the page as possible. The second code goes immediately after opening the <body> tag. Since this code should be available on all pages on our WordPress site, we will edit our theme code to inject the code in all pages.
Installing <head> code in WordPress
To install the code which goes in the <head> section. We will go to Theme Editor and edit functions.php file. In this file, we can inject code throughout our website based on specific actions. For example, we can tell WordPress to inject a javascript code right after the <head> or right after the <body> tag.
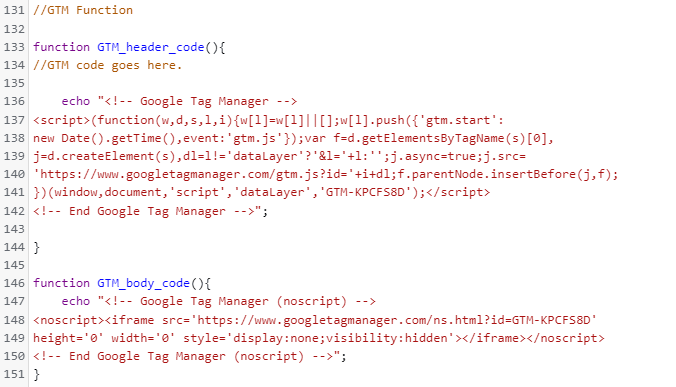
- In functions.php, Add signature of the function.
add_action('wp_head', 'GTM_header_code');
2. Secondly, Add function definition. In the code below, in front of the echo, add your code.
function GTM_header_code(){
echo "Add GTM Header Code Here";
}
Installing <body> code in WordPress
To install the code which goes just after opening <body> section, we will use the same approach as above. However, instead of using ‘wp_head‘ action, we will use ‘wp_body_open‘ function.
- In functions.php Add signature of the function.
add_action('wp_body_open','GTM_body_code');2. Secondly, Add the function definition. In the body code, replace all double quotes with single quotes. This will save you the hassle of dealing with PHP quotes.
function GTM_body_code(){
echo "Add GTM Body Code Here with single quotes";
}
Both the function definitions in my case are given below.
Verifying GTM installation
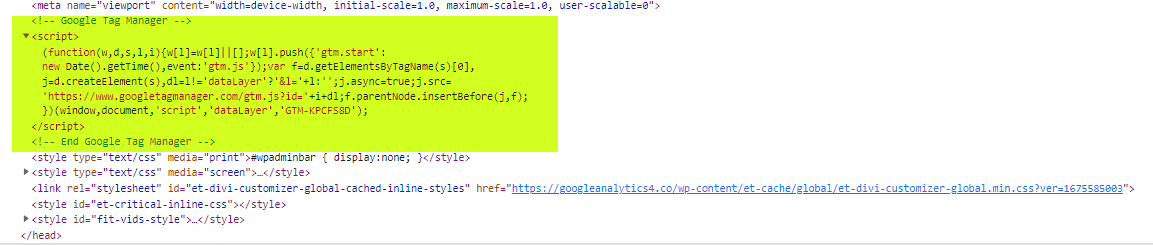
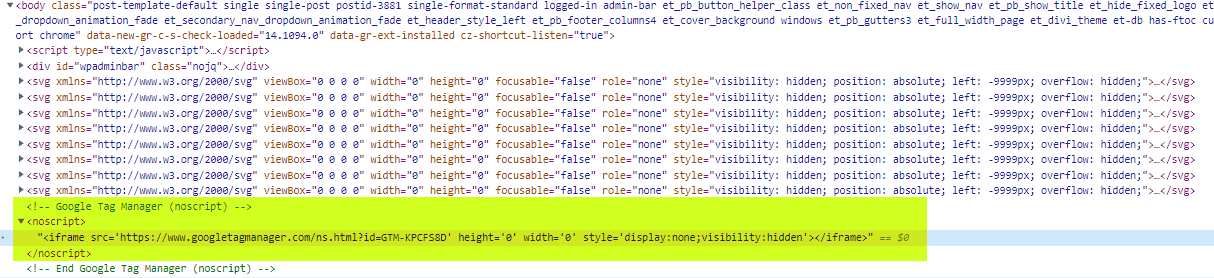
We can confirm by refreshing the page to see if it shows our GTM container now.
The image below confirms our <head> code appears in right place.
The image below confirms our <body> code appears in right place.

[…] Create a Google Tag Manager container and install it on your website. You can follow this article to create a Google Tag Manager container. […]